A Step by Step Guide: Getting Started with Squarespace for your Small Business
When I first started creating a Squarespace website, I didn’t know anything about it. I was feeling overwhelmed and didn’t know where to start. Even though I knew how to build a website, every website builder has a different set up process, features, and functionalities. Is this your first time building a site? Or you are currently using another website platform like Wordpress? I thought you might be dealing with the same situation I was in. To make the process easier for you, I’ve created a step-by-step guide on how to get your website started on Squarespace.
Before you start, it’s important to know that Squarespace offers 2 different platforms: version 7.1 and 7.0. They have many features in common, so this is totally your preference. I have been using the 7.0 ( earlier version ) for quite a while, so for now I will create this step-by-step guide with the 7.0 version.
Step 1: Select your template
Head over to www.squarespace.com and click on “Get Started”.

You will be asked to select a template from the latest version 7.1. If you want to use a template from the earlier 7.0 version like me, scroll down to the bottom of the page and click “template from an earlier version”. Or click here.
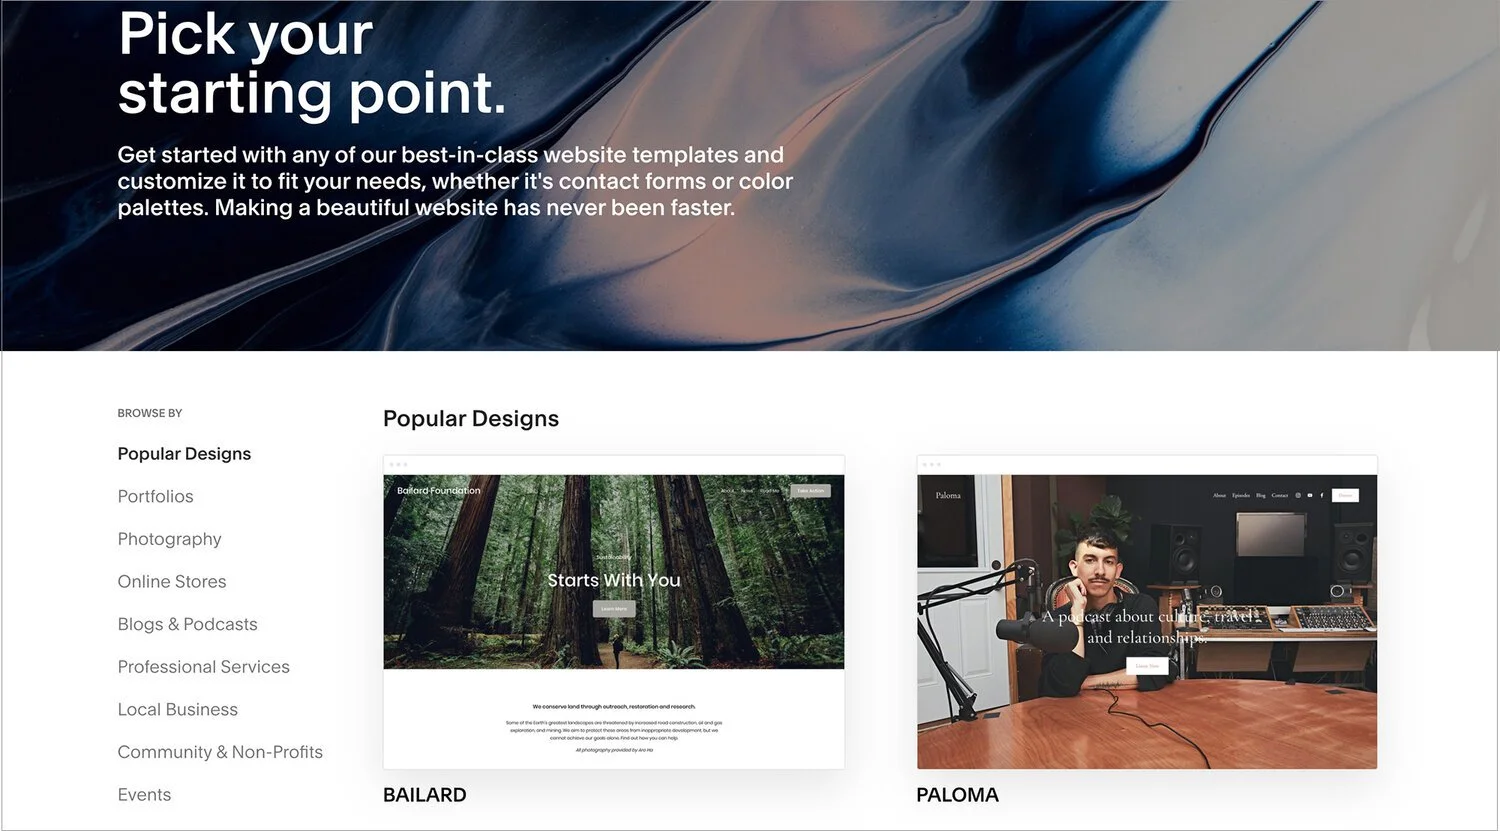
If you feel a little overwhelmed while viewing the 110+ templates available, you can narrow it down by doing a search according to the purpose of your website (for example “Service-based business”). Alternatively, you can scan ‘top categories’ on the left to see some of their more popular templates.
While browsing, you can preview each of them and save them to a list of favorites (click the heart icon) so that you can return to them later. When you have found your favorite, click ‘Start with template X’.

You probably get stuck in finding a perfect template for your business. I normally use a template family called “Brine”, as they are the most flexible.
Here are a few Brine family templates I selected
And the rest of the templates in the Brine family.
Aria, Basil, Blend, Brine, Burke, Cacao, Clay, Ethan, Fairfield, Feed, Hatch, Heights, Hunter, Hyde, Impact, Jaunt, Juke, Keene, Kin, Margot, Marta, Mentor, Mercer, Miller, Mojave, Motto, Nueva, Pedro, Polaris, Pursuit, Rover, Royce, Sofia, Sonny, Stella, Thorne, Vow, Wav, West
Mojave is one of the Brine family templates that I have been using for my website and some clients. I like this template because the design is simple and easy to use.

Step 2: Create an account for a FREE trial.
You can click, the “View Demo Site” to see if this template is right for your business. Once you choose a template with clicking “Start with This Design”, you are asked to create an account for a free trial that allows you a free 14 days period to explore the platform and experiment with design.
But don’t worry, if you don’t like the template you chose, you can pick another template and start over again.

Step 3: Select a plan
Squarespace plansare paid monthly or yearly.
Monthly Plan:
Personal Plan ($16/month)
Business Plan ($26/month)
Ecommerce Plan ($30/month)
Ecommerce Plan Advanced ($46/month)
Yearly Plan:
Personal Plan ($12month)
Business Plan ($18/month) Save up to 30%!
Ecommerce Plan ($26/month)
Ecommerce Plan Advanced ($40/month)
For most of my clients, I recommend starting with the Business Plan which will give you most of the features a typical service-oriented business would need.
But for right now, don’t stress about it if you’re not sure which plan will work best for you; you can always upgrade later if you find you need more features. The Business Plan is a good place to start.
Please don’t forget! You can save 10% on your first-year subscription. Use the promo code: GIMME10
Step 4: Take a moment to get comfortable with your workspace
Before diving into the design work, you should take a moment to check out the backend of your site. On the left side of the screen, you will see all of the tools you’ll need to make changes to your website. The right side of the screen will always show you a live preview screen.

Step 5: Start customizing with your basic information
On the left side of your screen, click ‘Design’ and then select ‘Logo & Title’ ( Design > Logo & Title). Your title should already be there from when you created your account, but if it isn’t, you can add a title for your site now as well as a tagline.
Next, add your logo. Keep in mind, your logo needs to have a transparent background to avoid having it surrounded by a white box on your website. To do this, make sure it’s saved in a high-quality .png file with a transparent background.

You should also add a favicon. This is a miniature version of your icon that appears in browser windows. Make sure it is a simple version of your logo that is still legible in it’s miniaturized form.
When you’re done with your updates, save your changes at the top of your screen.
Return to your home screen and click on ‘Settings’ and select ‘Business Information’ (Setting > Business Information). This is where you can add your business contact information, location, and hours.

Step 6: Set up your pages
When you are on your home screen, you’ll notice that your site gives you the following selections to choose from:
Pages
Design
Commerce
Marketing
Scheduling
Analytics
Comments
Settings
Help
To get started adding and editing pages, select ‘Pages’. To add a page, click on the ‘+’ symbol. You can add a blank page or a specific type of page depending on the purpose of the page (blogs, galleries, etc). Once you have selected a page layout, enter a title for the page and click ‘start editing’.

Before we get started on adding content, it’s important to mention that unlike other platforms, Squarespace does not use drag and drop technology. Instead, you will find that when you hover your cursor over an element on the right-hand side of your screen, a small bar will pop up with the options available to you.
To add a content block, click the ‘+’ in the top right of your screen (or hover your cursor between the blocks and click on the line that appears). A menu will come up allowing you to select the type of content you’d like to add (images, text, buttons, etc).

Step 7: Add your own style
Once you have your pages set up, it’s time to give them a style that works best with your brand. This is where you really get to fine-tune your site, from images to letter spacing.
Go to the ‘Design’ section and select ‘Site Styles’ ( Design > Stile Styles ). This will allow you to change the colors, sizes, and backgrounds for your main content, site headers, navigation, etc.

Step 8: Set up your marketing tools
If you selected a business plan or one of the Ecommerce plans, Squarespace gives you marketing tools to help you promote your business and keep track of your website’s performance.
Click on ‘Marketing’ on your main menu. You can add social media buttons, integrate your site with your social media pages, add pop-ups, or even create an email campaign.
To keep track of your marketing efforts, you can click on ‘Analytics’ in the main menu. Here you will find vital information on your website traffic and keyword searches so you can continue to improve your website. You can also connect Google Analytics to your site.
Step 9: Set up your Ecommerce features
If you are selling digital products on your website, you’ll need to set up and customize your site so you can take online orders, track your inventory, view your customers, and add discounts. Just click ‘Commerce’ from the main menu to get started.
Step 10: Transfer or add a custom domain name and Launch!
While you are working on your domain, you will notice that you are given a default Squarespace domain name (for example yellow-aramadillo.squarespace.com). Not to worry though, you are not stuck with this name! To change this, you first need to upgrade from your free trial. On the main menu, Go to ‘Settings’ and then onto ‘Billing & Account’. Click on ‘Billing’ ( Settings > Billing & Account > Billing ).
To edit your domain name, select ‘Domains’ from the settings menu. Follow the instructions as you are prompted (and don’t worry, Squarespace will transfer over all of the customizations you made to the demo site). If you’re nervous about losing all of your work and feel uncomfortable with this step (as many beginners do), just reach out to Squarespace support. They will stay with you and walk you through it until you are up and running.

I hope you have found this step-by-step guide helpful to get your online business website up and running. Just remember that nothing is set in stone. If you change your mind about a template, you can go back and change it. If you need different features as your business grows, you can upgrade your subscription plan. But the true beauty of using Squarespace is that you can create a top-notch, professional-looking site, that is not only easy for you to alter and customize, but it is simple and clear for your site visitors to use as well.